Water Cooled Digital Audio G4 Tower (page 2)
by Ron G.
Posted: 3/5/2003
(Continued from Page 1)
Water cooling a G4 dual processor.
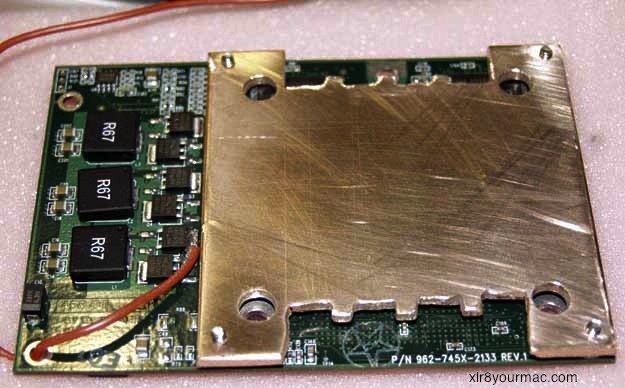
Picture 16
Picture 16 shows the adapter plate fitted to the CPU module with four
screws which self tapped the soft copper. Three screws are used to
secure this assembly to the logic board. Two screws fit through the
holes in the copper on the bottom/near side of the picture and the
third mount point is visible at the top/rear where the copper has been
removed to make a 'socket-462' shape. NOTE: WARNING: CAUTION: (got your
attention :-) There are four plastic shims which come with the
PowerLogix upgrade. When you remove the original heat sink from the CPU
module be sure to save these. They provide exactly the right spacing
between the circuit board the PPC chips are mounted on the bottom
surface of the heat sink. IF YOU ATTEMPT ASSEMBLY OF AN ADAPTER PLATE
WITHOUT THESE SPACERS YOU WILL LIKELY DESTROY THE CPU MODULE.
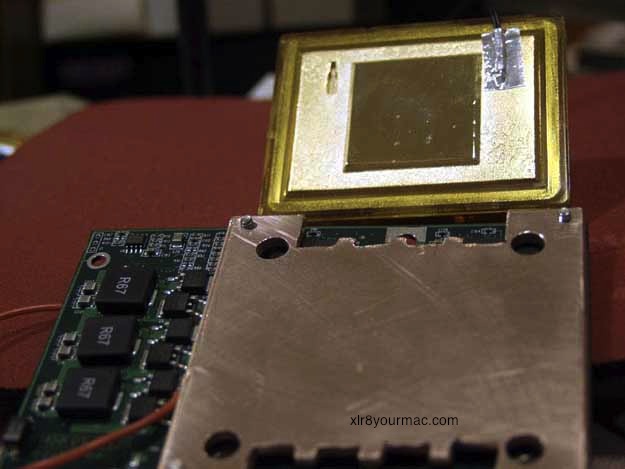
Picture 17
In picture 17 the Koolance 200G water block is positioned above the CPU
module with adapter plate mounted. Note that barely visible on the
lower half of the water block is an 'imprint' of an Athlon Palomino CPU
die. This Koolance Exos kit was shifted from an Athlon Palomino 2000+
(1660mhz) overclocked to 1760mhz. Also visible is the thermocouple
supplied with the EXOS kit. (Under the silver tape on the top right of
the water block.)
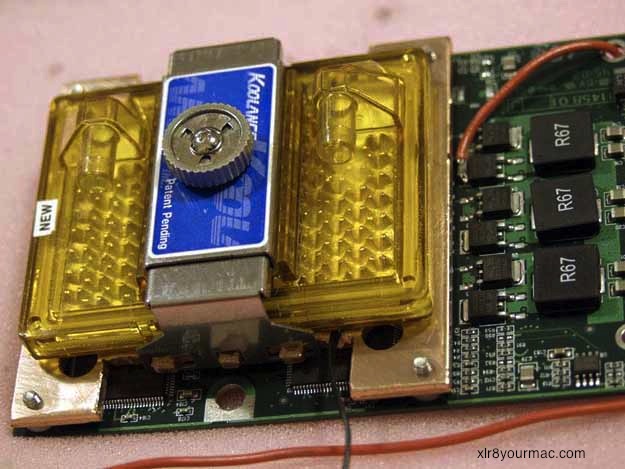
Picture 18
Picture 18 shows the Koolance 200G water block fitted on the adapter
plate with the Koolance clip. Note that this is just a fit test. The
CPU module and adapter plate assembly must be screwed to the logic
board before this can be done for real since the water block obscures
two of the CPU module to logic board mounting points. The third mount
point, which is not blocked, is visible at the bottom/front of the
picture.
Picture 19
Up to now the pictures were taken as test fittings were performed to
ensure physical tolerances were being met. I.e., just to see if the
pieces physically fit. But in picture 19 you can see that
things are getting serious. Thermal paste has been applied to both PPC
CPU chips before the adapter plate was screwed to the CPU module and
with the CPU module and adapter plate assembly secured to the logic
board thermal paste has been applied to the top surface preparatory to
clamping the water block down on top of the paste.
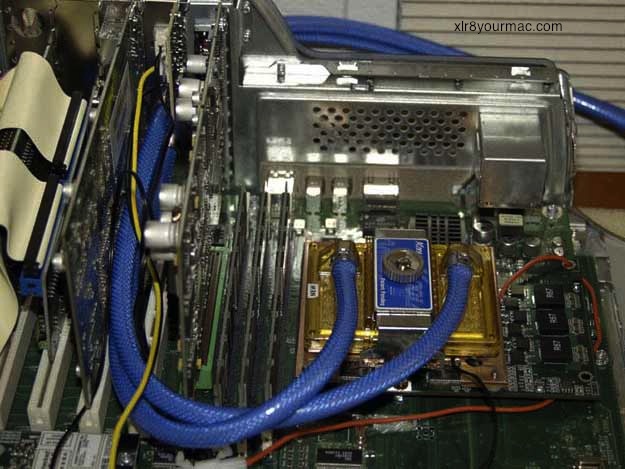
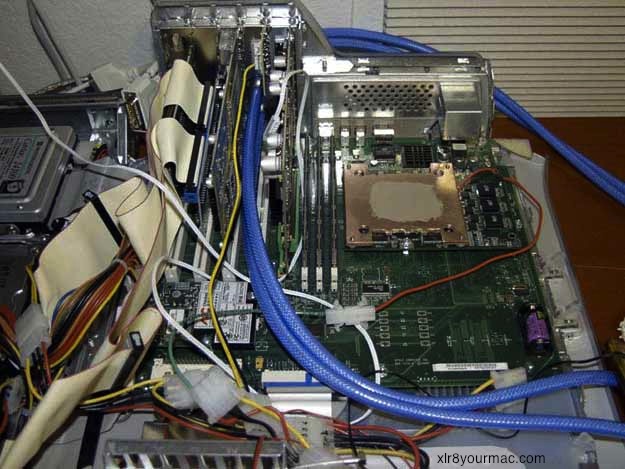
Picture 20
Picture 20 has it all mounted on the logic board. Hoses attached.
Filled with water and pre-charged all according to the Koolance
instructions. Well, almost according to Koolance instructions. They
provide a jumper and describe a way to jumper an ATX power supply to
run the pumps with the logic board (mother board for PC people)
disconnected from the power supply. Rather than do this I just used an
old spare AT style power supply laying around to power up the EXOS
system and get it properly charged with water. However you do it, it is
crucial that for initial operation the EXOS is operated before
power is applied to the chips it is to cool so that air can be purged
from the system and the reservoir is topped off. BTW, this is only for
the initial start-up. Subsequently it powers up and down along with the
computer.
Checking for leaks isn't such a bad idea either.
In fact, I completely assembled this cooling system and let it run on
the kitchen counter for about eight hours before I installed it in the
case. Tip: You can't remove the hoses from the water block once
installed. (Well, you can, but it is a royal pain and you need to cut
off about the last half inch of hose each time. And the clamps only
have a limited number of removal/reapplications.) However, it is easy
to remove the other end of the hose that use compression fittings for
attaching to the EXOS main unit. These come off easy and are easy to
reapply. So just do that and snake the hoses through the PCI cover
plate the 'long way around' when you are ready for final assembly.
Ready for test run. Dang! Those three "R67" chips get far too
hot to touch. (See pictures 2, 16, 17, 18, 20.) Power down and analyze
the situation. The original heat sink did not sit on these hot
critters. (See pictures 1 and 6.) However, there is a cutout in that
heat sink which allows some air to flow through the bottom and out of
it over this area. OK. Something needs to be done to keep these power
chips cooled, a little.
Picture 21
Picture 22
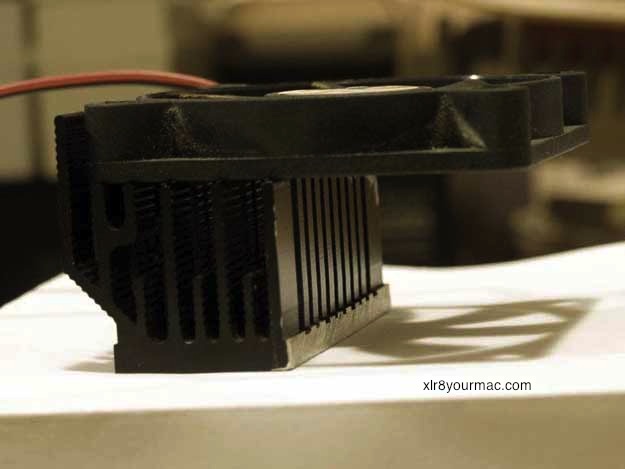
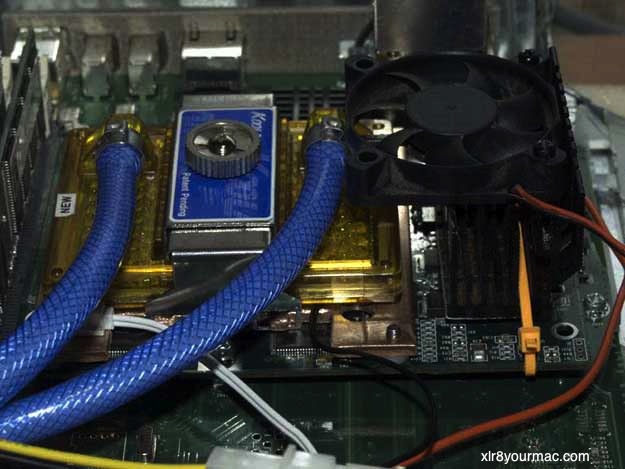
Wahlah! Custom cooling for the voltage regulator chips shown in
pictures 21 and 22. Fifteen minutes with a hacksaw and an old K6 heat
sink becomes half the width and a perfect fit. Fan provides air flow
for the heat sink and also blows over some 'lessor' voltage regulators
which also run hot. But not nearly as hot as the big guys. Anyway, the
original heat sink/fan blew air over them, so I blow air over them.
Picture 23
Picture 24
Case closed. After several hours of runtime under full load the
Koolance temperature reading (measured by a thermocouple on the water
block) has stabilized at 32C/91F. The thermocouple mounted on the
adapter plate reads 37C/98F. The 7F delta was pretty constant as the
temps slowly ramp up from a cold start.
Noise level. Not silent, but pleasantly low. There is still the power
supply fan (which I had already replaced with a thermal controlled and
quieter fan), the 12in case fan (which is thermo controlled and I'm now
running at 7v instead of 12v), and the four disk drives. The Koolance
EXOS itself is almost inaudible. I can now monitor boot up activity by
listening to the head seeks on the drives <g>.
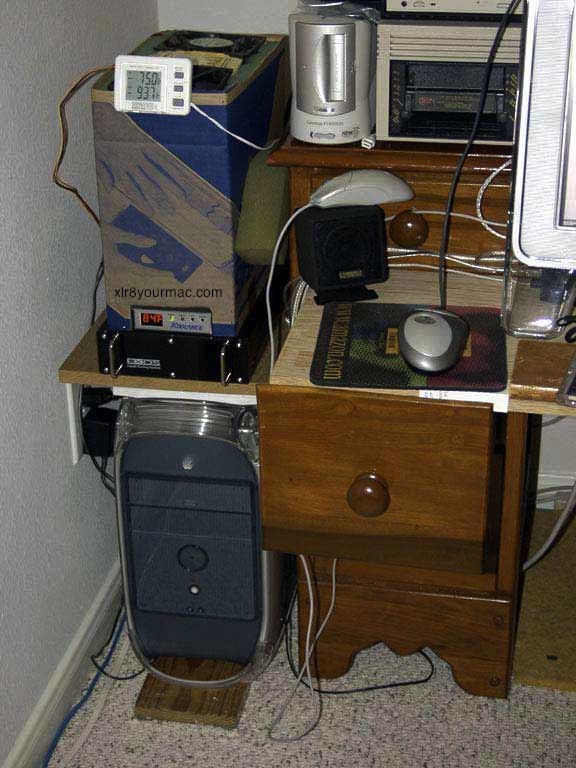
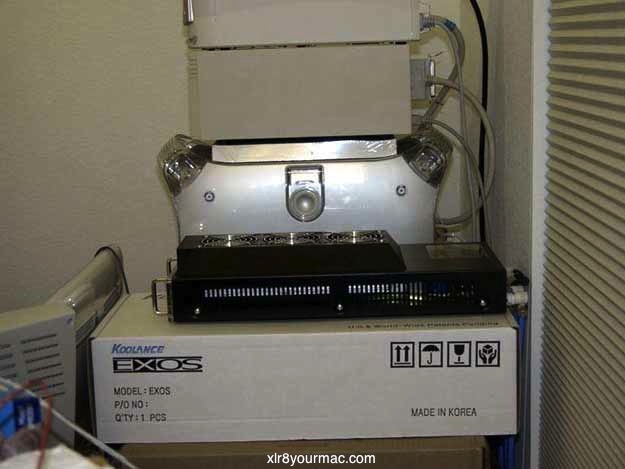
Picture 25
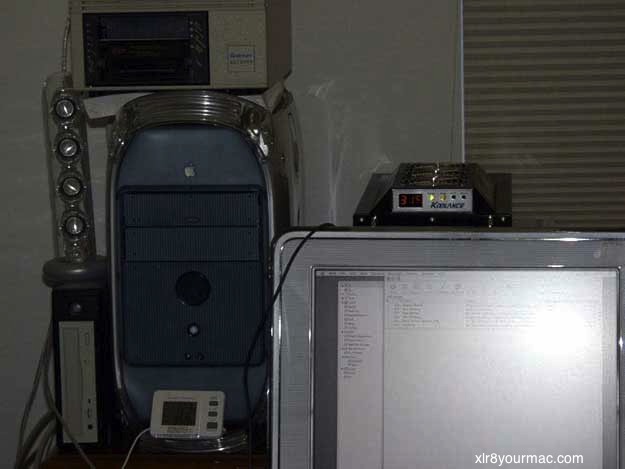
After a couple of days running the system on the desk during a 'shake
down period' I moved the system back to its original location on the
floor beside the desk. Shown here in picture 25. The system has been
running twenty four hours a day for a week now running
compute/numerically intensive tasks. (Distributed computing number
crunchers in addition to normal duty. An ecc2-109 client for a few days
and rc5-72 for the last couple of days.) It is important to run full
system stress inducing code on a system after doing any cooling
modifications because such software causes the CPU chips to generate
substantially more heat than when they sit idle.
OK. I know, I know. You want to know what that box with the two fans is
doing sitting on top of the EXOS. It isn't necessary. Really. I've just
got a lust to tinker.
To test whether there was any reinduction of exhaust air I folded a
piece of cardboard to duct the exhaust well beyond where it might be
possible for any to flow back into the intake. This actually did make a
difference of about 2 degrees C measured by the water block
thermocouple - the reading on the front of the EXOS. With this duct
sitting there I happened to notice that it was just the right size to
fit a five inch fan into. (There were fans laying all over my desk from
the prior air-cooling efforts.) And a large diameter fan running at low
speed makes very little noise. So, just to see what the effect might be
I put two 5in (120mm) fans in the top of the duct (with foam applied as
needed for physical fit and moderate 'air-tightness') and powered them
with a 9vdc transformer. This added an insignificant amount of noise
(barely audible difference as an A/B test with them on/off), and an
additional 5 degrees C reduction in water block temperature. Not
needed. But, hey, cooler is always better, right <g>? And it will
provide that much more margin for the Summer when I like the room to be
about 10 degrees F warmer than it is now.
Epilog
Well, that was fun. And it is just as fun to be actually using a
computer which is over twice as fast as what I started with and
provides an office environment where I have no distracting howling
beasts which I just have to live with unless I want to start doing all
my work on notebook class hardware. My workspace has the 1.33GHz DP Mac
on the left side of the desk and a 2100+ Athlon on the right. Both
water cooled. And it is the quietest work environment I've had in many
years.
Final Statement
OK. Now that you've seen this saga it should be abundantly clear to
everyone that no sane person would do such a thing. I am not
recommending that you take any such action. I am not responsible
if you try any stupid stunts, even if they bear some resemblence to
stupid stunts I may have performed, and damage of any sort happens to
your hardware, your software, your data, your rug, your real estate,
your person, or your state of mind. If you open your box, anything
which might happen is your responsibility.
-Ron Gazaway
Austin, TX
March 5, 2003
(There's also a page here on Water Cooling a Mirror Drive Door G4 Tower.)
For other Mac Mods/Conversions and related articles, see the Systems page.
|
