How I "Silenced" a WD Raptor in a Mac Pro
By Oliver B.
Posted: June 4, 2007
(Note: Per comments on the 2008 Mac Pro reports page, the new models use rubber rings on the drive sled screws and springs in the rails to help dampen vibrations/noise. The article below is from Oliver's original model Mac Pro - in late Jan 2008 he sent a Mac Pro 2008: Guide to optical bay hard drive installation.)
I've been using a WD Raptor 150GB in my earlier Quad G5 and later in a Mac Pro. Using the normal Mac Pro hard drive bays the Raptor was
audibly louder than it was in the G5. There was no audible idle noise in the Mac Pro, but seeks were much more pronounced than they were in
the G5 (which is understandable I guess... it's due to the new mounting method in the Mac Pro: harddrive directly on metal sled in
metal "rails"). On the Raptor I have 3 partitions: Mac OS X, Applications and my Home. These are of course in use most of the
time, so seek noise was heard often, most noteably during login. In time, seek noise became somewhat irritating, especially since everything else is very quiet: I changed the fan on the Radeon X1900 XT months ago, and the other 2 drives (WD5000AAKS + Deskstar 1 TB) are barely audible.
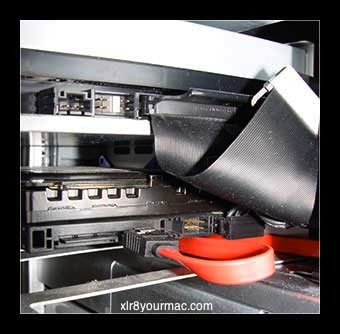
So I eventually moved the Raptor into the lower of the optical drive bays, and mounted it using some 3.5"-drive to 5.25"-bay "silent" adapters, where the drive is fixed by rubber elements (see picture). The Raptor still has an old style (molex) power connector, so I was able to use the power molex plug provided for a lower bay optical drive. Then I used a SATA data cable to hook the drive to one of the spare SATA connectors on the motherboard.
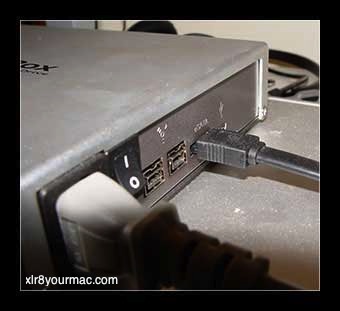
The other of those spare SATA connectors I used for my external backup drive, which has an eSATA connector (in addition to Firewire 800). All it took was a cable with a SATA (L-type) connector on one end and an eSATA (I-type) connector on the other end, which I was able to buy for about $5 (plus $10 shipping ;)).
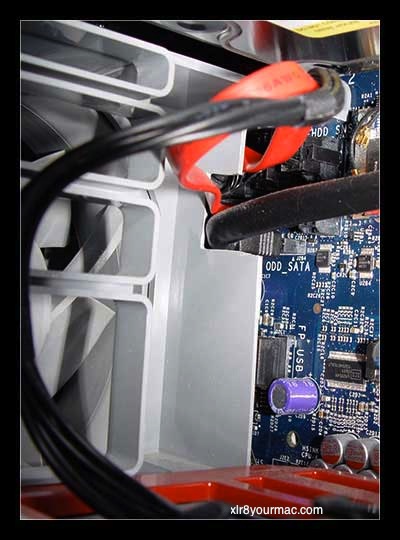
As the eSATA cable is shielded and rather stiff I had to cut out some of the front-fan-assembly, so both cables can be connected to the
additional SATA ports without being bent out of shape. :) To remove the front-fan-assembly I had to remove the CPU-heatsink-cover as well
as move the memory-bay-cage somewhat etc., as described on
www.xlr8yourmac.com/feedback/Mac_Pro_Ext_SATA_Case_Kit.html
The result is that seeks of the Raptor are now barely audible anymore, and the backup drive is as fast as an internal drive. This bit of tinkering was well worth it for me. :)
Attached you'll find 5 photos (below)
-Cheers, Oliver
The front-fan assembly with a piece cut out,
two cables connected to spare SATA ports
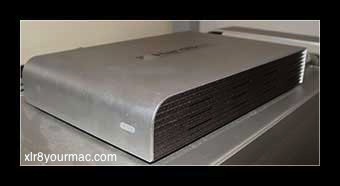
External HD case (front)
External HD case (back): connector
Raptor in optical bay (front): visible rubber mounts
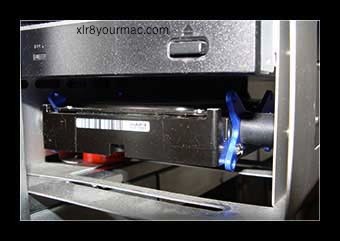
Raptor in optical bay (back): connectors
(Note: He's using an "X-Swing HDD decoupler")
|
